Blog with Gatsby.js + Netlify
April 22, 2019
In this post, we look at how to create and customize a Gatsby.js blog and how to put it online on Netlify. This is not going to be a deep walkthrough, we’re going to cover only the not so obvious parts.
Set up
First we need to install the Gatsby CLI, which will give us the gatsby command:
npm install -g gatsby-cliThen we’re going to use one of the Gatsby starters, since we’re aiming to build a blog we’ll be using the gatsby-starter-blog in particular, now that we’ve choosen our desired Gatsby starter we create a new project using it:
gatsby new personal-blog https://github.com/gatsbyjs/gatsby-starter-blogWe then change to the new directory:
cd personal-blogNow we have to run:
npm install gatsby-cli --saveIn order to insert gatsby among the dependencies of our package.json file, which it’s going to be necessary for Netlify to properly build our site.
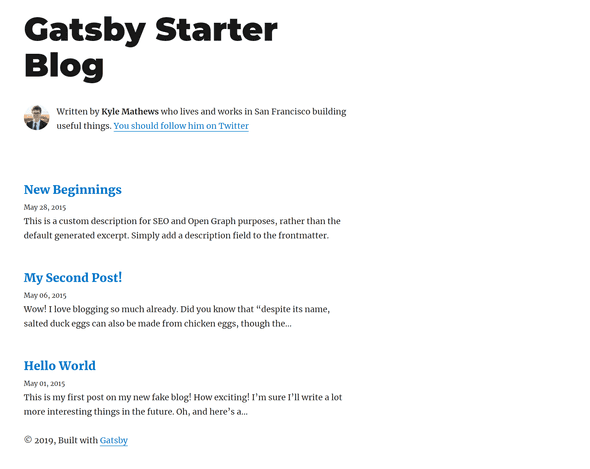
We are ready to fire up our development server and see how our initial blog looks:
gatsby developOn localhost:8000, you should see something like this:
Manage posts
You can create and delete all your posts in the content/blog folder, to create new ones just add them there as .md files.
Customization
Now, we have to customize the gatsby-config.js file, change the siteMetadata to your liking and also insert your Google Analytics tracking id if needed.
With the usage of the gatsby-starter-blog starter, we have automatically been using the Typography.js toolkit which we’re going to benefit a lot from to style our blog.
We are going to change the theme that our blog is using, you can take a look at their demo site and see what Typography.js has to offer, pick one that you like.
Since we would like to use the Noriega theme, we see that it uses the Lato typeface, so we proceed to update our package.json accordingly, we add our new typeface and remove the ones that we don’t need anymore, likewise with the themes:
"typeface-lato": "0.0.54",
"typography": "^0.16.19",
"typography-theme-noriega": "^0.16.19"
Since we’re already modifying our package.json we have to update the homepage and repository:url options to match the ones of our project.
We have to install our new dependencies:
npm installUpdate our gatsby-browser.js file, to include our new typeface and delete the ones previously used:
import "typeface-lato"Update our typography.js to use our new theme:
import Typography from "typography"
import Noriega from "typography-theme-noriega"

Noriega.overrideThemeStyles = () => {
  return {
    "a.gatsby-resp-image-link": {
      boxShadow: `none`,
    },
  }
}

delete Noriega.googleFonts

const typography = new Typography(Noriega)

// Hot reload typography in development.
if (process.env.NODE_ENV !== `production`) {
  typography.injectStyles()
}

export default typography
export const rhythm = typography.rhythm
export const scale = typography.scale
Finally delete this line from layout.js:
fontFamily: `Montserrat, sans-serif`,Since it makes some h3 elements to use the previous font.
Syntax highlighting
We can leverage the PrismJS syntax highlighter to style our code snippets, since we already the gatsby-remark-prismjs plugin included in our gatsby-config.js the only thing left to do is to pick one of the themes PrismJS offers, in order to use it we just have to require it in our gatsby-browser.js:
require("prismjs/themes/prism-tomorrow.css")And with this you’ll se that all of our code snippets are showing with the solarized light theme.
If you want to further customize the syntax highlighting take a look at gatsby-remark-prismjs docs
Deployment
In order to deploy our site to Netlify we have to push our git repo to one of the following: Bitbucket, GitHub or GitLab, from which Netlify will pull and build our project. This is a very straightforward part, the only thing that we need to remember is to set up the Build command and Publish directory under Build settings in the Deploys menu of Netlify, like this:
From this point on, Netlify will trigger a build and deploy our site every time we push changes to our remote git repo.
And this is it, we have our brand new customized Gatsby blog up and running on Netlify!

